Monday, September 16, 2013

Burlap & Berries Fall Wreath

Yesterday I had a burst of energy and decided since it's not too often that happens these days to take advantage. I took the opportunity to head over to the craft store and pick up some items to make a wreath. And this is what I came up with.


I found this tutorial on Pinterest on how to make the looped burlap wreath which I used at first and then made up the rest as I went along. To be honest I didn't know exactly how I wanted the wreath to end up, but I had a big  monogram "D", burlap, a wire wreath frame and some berry garlands I picked up for 30% off.

To recreate a wreath like this,  you'll need:

2 rolls of wide burlap "ribbon" (my rolls were 20ft each and I used 1.5 rolls)
1 roll of berry garland (mine was bendable which helped me to attach it to the wreath)
1 large monogram letter
1 15in. wire wreath frame
a glue gun with glue sticks


1. First I had to figure out how to loop the burlap in and out of the wire frame. This is what I used this tutorial  for, but to be honest, I had to do some trial and error at first until I got myself into a groove. To begin the burlap I wrapped the end around the wire frame and glued it to hold it in place. I ended up cutting the burlap into long strips to make it a bit more manageable to work with and had to glue the ends each time I finished and began a new strip.


2. Work your way around the frame making your loops as loose or tight as you wish. I made mine fairly loose since I liked the look of a wider wreath and because I was afraid to run out of burlap. 20 ft of burlap goes quicker than you would think!


3. Once you finish, check your loops and glue into place any that seem floppy or in need of some reinforcement. Then, add decorations. I used berries and bent the wire around the wire frame and used the glue as reinforcement. I also glued our "D" monogram at the bottom to pull it all together.

    You could also use silk flowers, buttons, pine cones, twigs or anything else you have lying around your home.


Less than 1 hour later, I had a fresh new wreath and couldn't wait to hang it up on our door! There's something about a fall wreath that really signals the transition from summer to my favorite season!!


So...what do you think!? 

Tell me: What would you use to decorate a new fall wreath? Or, what does your wreath look like?

Keep in Touch with La Vita DiBella!
Subscribe to Blog I Follow on Facebook I Follow on Twitter

      Follow on Instagram I Follow on Bloglovin’

Saturday, September 14, 2013

Crisp Air

There's just something about the first crisp day. I know, I know...Autumn doesn't actually begin until September 22nd. But I think that's just silly. To me, Autumn starts with the first crisp day. As soon as that happens, in my home the pumpkin candles come out, I start baking things with pumpkin ingredients, and I start brainstorming the many ways I could start decorating with cozy accents for the season.


Can't you just smell the pumpkin through this post!? mmmm. September and October are truly my favorite months of the year. I love digging out the cozy sweaters, cuddling in blankets on the couch, picking apples and pumpkins and baking delicious fall treats. So all you Autumn haters out there: I'm sorry but this is my season!

It also helps that I have finally been feeling a bit more like myself. I was hoping to only have to take a very short break from the blog, but that "break" turned into a 6 week hiatus. To tell you pregnancy is exhausting would be an under statement. To all of you out there who have had children: I have SO much more respect for you now! ...and I have somehow ended up one of the rare lucky ones that didn't get sick. (don't hurt me). But, I'm pretty sure that I payed for that with super extra exhaustion. I feel like August just didn't happen because I was either busy working at my new job, forcing pizza, pasta, and toast down my throat hoping not to gag and sleeping...but "sleeping" means falling asleep only to wake up the next hour to use the bathroom anddddd repeat for the next 7 hours. Not pleasant.

Anyway, we are now at week 14 and I am starting to feel my energy creeping back slowly along with my appetite. I still cannot even look at chicken unless it's fried and slathered with buffalo sauce. Vegetables are only good if they are hidden in some way like in a wrap or panini or in spaghetti sauce. And black beans are still out of question along with hummus, both of which used to be staples of my diet. Apparently Baby D is picky. Eating has become somewhat of a chore lately due to both my neurotic appetite and lack of energy, but I'm determined to learn to use a crockpot--hopefully that will at least help the energy part. Recipes welcome.

Anyway, one of the things I am so excited about is to finally have the energy to pull our apartment back together and decorate for the season! First I plan to update our door with a new wreath. Pinterest has had some great ideas and I thought I'd include my top picks. Hopefully I'll have time to work on it this week so stop back for details!

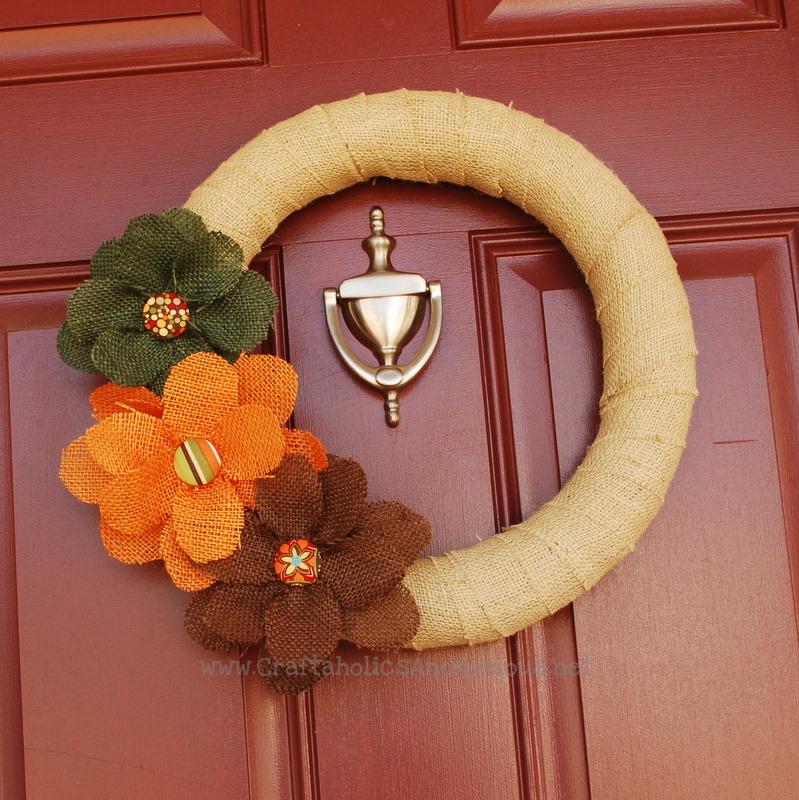
Burlap: I love this, but it looks a bit complicated. I think you need a special type of wreath base to make the burlap all loopy.

Burlap Wreath - Burlap Projects
Source


This wreath is from Etsy, but I could easily make this using a wreath base, a glue gun and some berries from a craft store.
Fall Berry Wreath
Etsy

Same deal here...but I love the burlap bow. I'm a sucker for burlap. 

Easy DIY Fall Berry Wreath!
Source

I bet I could collect some twigs and make this just by glue gunning (verb?) them together and making a few felt rosettes.
Pretty wreath
Source

Colored burlap!!? Again, I'm a sucker for burlap. period. 

Source

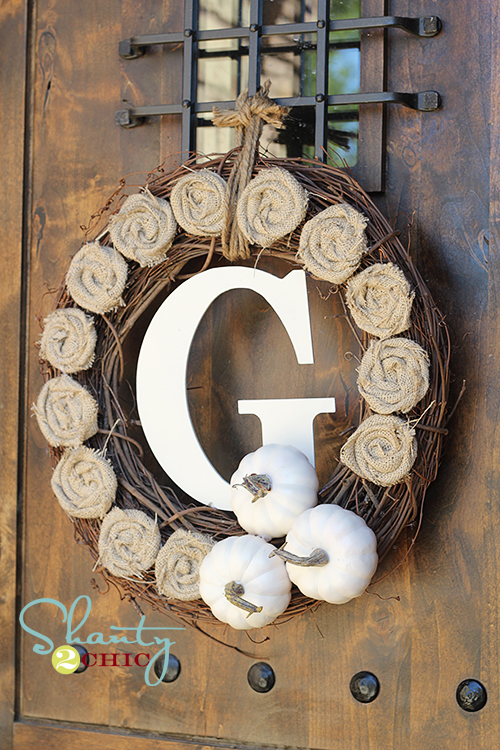
This wreath is gorgeous, but I would definitely make this without the pumpkins. The monogram is a nice touch, though. 

Source

  Tell me: What do you think? Which wreath would you choose to make?

 Keep in Touch with La Vita DiBella!
Subscribe to Blog I Follow on Facebook I Follow on Twitter
 Follow on Instagram I Follow on Bloglovin’

Monday, September 2, 2013

A Little Surprise

Hello Everyone!! I know it's been a while since I've posted and I'm sorry for leaving for longer than my previously estimated "2 week" break. Things got a little more crazy than I expected. I have officially started my new job 4 weeks ago and so far everything is going great! I love my job and definitely feel like it was the right position for me to take.

The other thing that has kept me more than a little bit occupied and away from blogging (among other things) is this little surprise...


Yep! Frank and I found out, very shortly after I accepted my new job that we are expecting a little addition to our family this March. We are beyond excited, and I have been beyond exhausted for the past six weeks or so. The real reason I knew I needed to take a break from blogging for a bit.

I just wanted to stop by and share our exciting new since it's been incredibly hard for me to keep my lips sealed all this time! I honestly don't know how people do it--we ended up spilling the beans to our parents almost right away!

I will be continuing to blog, but I will be honest, it probably won't be my usual 4 posts a week. I will try to keep up with doing some projects around the house and updating you all on the happenings around the DiBella home. I will also likely be sharing some of my pregnancy experiences since I want to make sure I remember this special time in our lives.

I hope you all are having a wonderful Labor Day weekend! I'll be back later this week for more updates.


Thursday, August 1, 2013

Brief Hiatus

Hi Everyone! I hope your summers are all going well! And I hope you love our new kitchen table! We are loving it!

Just wanted to stop by quickly and let you know that I've decided to take a brief hiatus from the blog. Probably for two weeks or so. I start my new job on Monday and want to give myself some flexibility as I transition and get accustomed to a new routine and a new role at a new place.

When I return I will share a post on our table and how it's holding up and will update you all on what's been going on the past few weeks while I've been super busy and terrible at keeping up with posts!

You can still keep up with us on Facebook, Twitter and Instagram (see below) to keep up with what we're doing while I'm on this "hiatus" and also to be sure not to miss our posts when I return!


Happy first day of August!


Keep in Touch with La Vita DiBella!
Subscribe to Blog I Follow on Facebook I Follow on Twitter

      Follow on Instagram I Follow on Bloglovin’

Monday, July 29, 2013

Pedestal Table Make-Over Reveal

Well, finally!! Yes, we have finally really for real finished our table make-over! It definitely took a long time, but it was worth the hard work, sweat, tears (yes, tears), and the long wait for such an exciting reveal!


This project was time consuming, and tricky at times, but really fun overall! So, we decided to share a detailed tutorial and tips/mistakes we figured out along the way in case any of you want to try to re-do your own table!

We found a great tutorial from {Addicted 2 Decorating} from a Pinterest pin and tweaked it along the way to make it work for what we wanted our table to look like.

So without further ado!

How to Make Your Own Round Table Top


First of all, you'll need a few supplies to get started. We purchased a majority of our supplies from Lowe's, but when we needed to get extra sand paper and a new sander we went to Home Depot which was closer.

1/ You'll need a piece of wood that is 2x12x16  OR two pieces of wood that are 2x12x8. Have someone at the store cut the board into 4 pieces that are 4 feet long. So, if you get the 16ft, cut it into 4 pieces, if you get the two 8ft pieces, cut both in half. Definitely make sure your pieces of wood don't look warped and look as straight as possible. You'll want a pretty good quality piece of wood if you want to eliminate a lot of sanding. We got a mid-grade piece of pine.
2/ You'll need lots of sand paper. In the picture we have 120 grit, but we ended up going back to Home Depot and getting 60grit and 100grit for the initial sanding, then 180 for fine sanding to finish it. I would also highly recommend getting an orbital sander if you do not have one and getting the sandpaper discs. We learned the hard way and started out without an orbital sander and had to buy one and extra sand paper to go with it!
3/ Get quality wood glue. We used Elmer's. Don't get the small bottle. We ended up adding more glue several times just to be safe.
4/ Get quality wood filler. We went with Elmer's again. We definitely didn't need that large container, but it was okay since we'll likely need it for other projects down the road.
5/ Pick up some shims to help to support the boards when you glue them together and clamp or strap your boards.
6/ Please use face masks!! And if you don't have protective goggles, pick up a pair of those as well.
7/ You'll need a jigsaw with a smooth cut blade. We didn't have one so we purchased one from Black & Decker at Lowe's. It came with a blade so we used that one and it didn't break and did a pretty decent cut.

You'll also need:
-two 1 x 2in. furring strips about 30 inches long
-#8 wood screws 1 3/4" long
-tack cloth to clean up sanding dust
-a router (if you choose to use this)
-primer
-stain or paint
-a finisher like polyurethane or lacquer


1/ First, lay your boards next to one  another making sure that the the boards fit the best you can. We had to move around the boards a few times to find the way with the least about of space between boards. Use a flat surface like a table or wooden "horses".


2/ Second, use a generous amount of wood glue to glue boards together one at a time. We ended up adding more glue if we saw gaps. Also, the glue will drip. Make sure you don't have anything valuable under or around where you are gluing. We put two pieces of wood underneath the boards as well as the old table to keep the boards stable and elevated.


3/ Third, you need to use 24" clamps or sturdy straps to hold the glued boards together. You may choose to use shims to help to support the boards and to prevent making marks on the boards. We used 2x2 boards to leverage our straps as well. We used straps from Frank's car racks since the clamps we had were not big enough. It worked fine, but I'd definitely recommend using clamps over straps.


4/ Make sure everything is tight, but you also want to make sure nothing is warping (i.e., tight but not so tight that the wood starts to bow). And then, you need to wait at least 24 hours for the glue to dry!


Then...once everything is dried...time for all the measuring!!


1/ Once everything is dry, you'll want to measure...and check your measuring. And, possibly, re-measuring. (you get the picture). We wanted to measure the table first. So we placed the old table top on top of our boards and measured around the edges to make sure each side was even. Then, we measured about 1 inch wider than the table for our first cut. You want to leave room for tons of sanding and uneven cuts.


Cut your furring strips and you can also taper the ends if you want.


Then, you want to measure where you're going to place your furring strips. We were going to attach our table top to a square board, so we used the one from the old table top to make sure we left enough room between our furring strips for that. It's important to think about how you're going to attach the table to the base before you measure everything!


Then, measure where you're going to place your screws to drill the furring strips. We used pencil to mark on the furring strips and made sure the placement was even on both.


2/ Next comes one of the most important steps. Pre-Drill.  Do not forget this step. Please. If you do, you could completely split your table before you've even tried to cut it. Then, it's back to the hardware store and starting from square one. Does not sound fun? Pre-Drill.


3/ Now, once you've pre-drilled, you can use wood glue to place your furring strips onto the table boards and screw your furring strips into place. This was my favorite part. Power tools!!!


4/ My least favorite step that seemed to repeat itself alot...Allow to Dry. It's so hard to wait!! Good thing I had a ton of painting to do...


I sanded down and primed the pedestal base. Then, I applied two coats of Martha Stewart's Nimbus Cloud from Home Depot.


Next, it's time to make the first cut!! We double checked our measuring and practiced on a junk piece of wood since we had never used a jigsaw before. Then, we cut around the outer traced circle for the first cut and we cut from the underside rather than on top so that the table would lay flat. It took two people to rotate the table since we used a table rather than "horses".


Then, it's time to sand!! (please notice that this is complete sarcasm...sanding was terrible).

For 3 days...yes 3 days we used this sander and the original sand paper we bought at Lowe's.


After all that time we started to get frustrated. We continued to use a level to check to see if our table was flat yet, and it wasn't. The ends of our table began to warp upwards and the joints where the boards were glued seemed to be impossible to sand down.

On the third day I broke down and tears thinking that we had failed and that we would need to start over. I heard from some people that we had purchased the wrong wood, that we glued them the wrong way, and that we needed a different sander. So, we decided the only thing we could do at this point was get a different sander.

Best. Choice. Ever! This little orbital sander saved our table and possibly our sanity!


Learn from our mistake and save 3 days of your time and get the orbital sander first! This thing worked wonders and in an afternoon our table was finally as level as it would get! And super smooth!


Once you feel your table is pretty level you may choose to use wood filler to clean up any dents, knots, and the joints between the boards. We used Elmer's brand and it worked great!

You do have to...yep,  you guessed it, WAIT again. The wood filler needs to dry for 2-4 hours before  you can sand it and 24 hours before you can prime, stain, or paint it. 

After about 3 hours we sanded everything down and then used Frank's brother's router to clean up the edges of the table.


After the grain was nice and smooth, we applied three coats of stain to the table top and three coats of polyurethane all over the table top and lacquer on the pedestal and chairs for protection. We used Minwax.


We made sure we waited 24 hours for the table and chairs to dry and 36 hours before actually using the table to make sure the protective coating was completely cured. Then, we used the square board to drill the table top to the pedestal.

And, voila! A few weeks later....we have a "new" table! (It only took us so long since we had nowhere to paint/stain/build in our apartment, so we had to visit Frank's mom's home to do most of the work).


Introducing our brand "new" kitchen table:


Summer 2013


So, what do you think?

Keep in Touch with La Vita DiBella!
Subscribe to Blog I Follow on Facebook I Follow on Twitter
      Follow on Instagram I Follow on Bloglovin’